
A table of contents in PowerPoint is a slide that lists your presentation’s sections, helping the audience navigate and follow along easily.
PowerPoint doesn’t create one automatically, but there are 5 ways to add one: using Outline View, dragging slide thumbnails, Slide Zoom, or adding it manually. This guide walks you through each method step by step.
How to Create a Table of Contents in PowerPoint?
There are 4 methods to create a Table of Contents in PowerPoint:
Method 1: Create a Table of Contents in PowerPoint Using SlidesAI
Creating a table of contents manually can be time-consuming, but SlidesAI makes the process quick and effortless. Here’s how you can generate one in seconds.
Step 1: Open SlidesAI
Step 2: Go to templates and select All presnetation templates
Step 3: Search for “Table of Contents Template” and select it.
Step 4: Once the template page is open, on the right side, click on the “Download” dropdown and select PowerPoint.
Step 5: Your template will be downloaded.
Step 6: Open the downloaded template in PowerPoint. Make the required changes, and your calendar slide will be ready.
Method 2: Use Outline View to Create a Table of Contents
Step 1: Switch to Outline View: Go to the “View” tab on the ribbon and click “Outline View.” This displays your presentation in a text-based format, showing headings and subheadings.
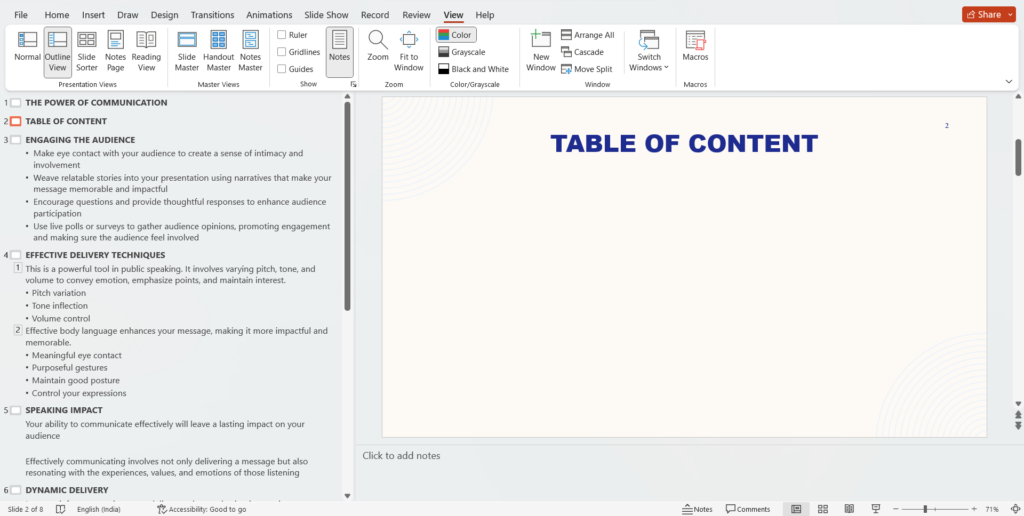
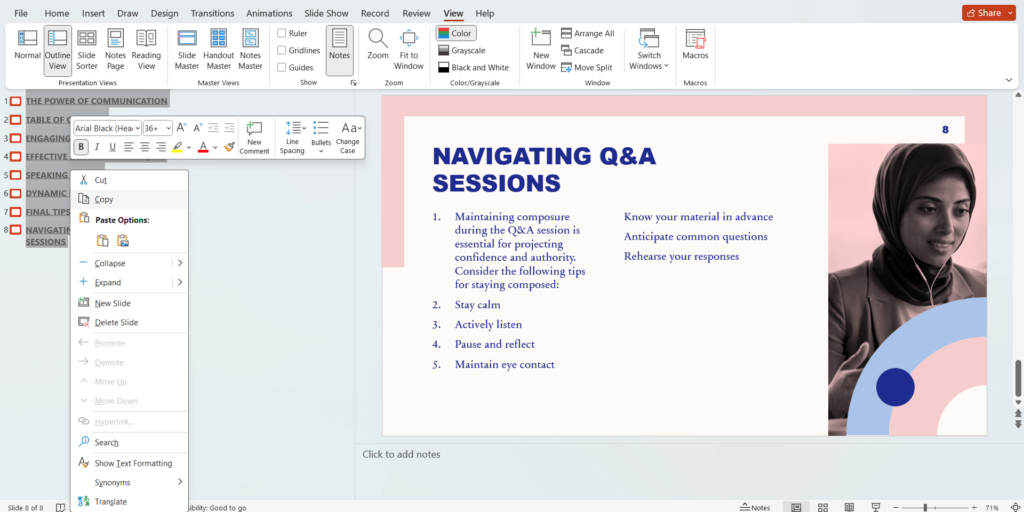
Step 2: Collapse Headings (Optional): While in Outline View, you can simplify the view by collapsing all headings. Right-click anywhere in the thumbnail pane, navigate to “Collapse,” and choose “Collapse All.” This hides subheadings and makes it easier to select all slide titles.
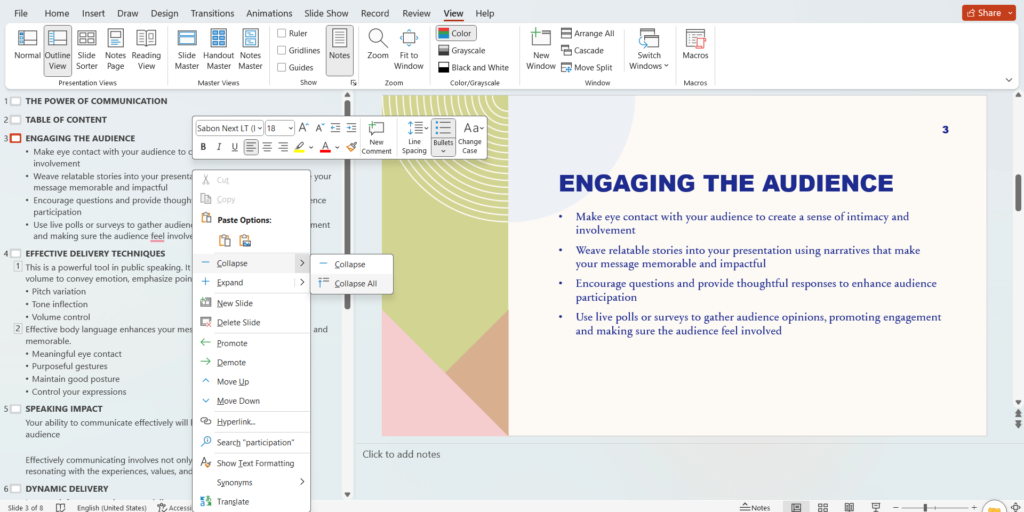
Step 3: Copy Slide Titles: Select all the slide titles you want to include in your table of contents. Click and drag across the titles, or use Ctrl+Click (Windows) or Command+Click (Mac) for non-contiguous selections. Right-click on the selection and choose “Copy.”
Step 4: Switch Back to Normal View and Paste: Go back to “Normal View” by clicking the button on the “View” tab. Navigate to the slide where you want your table of contents. Click on the text box where you’ll display the titles. Right-click and choose “Paste.”
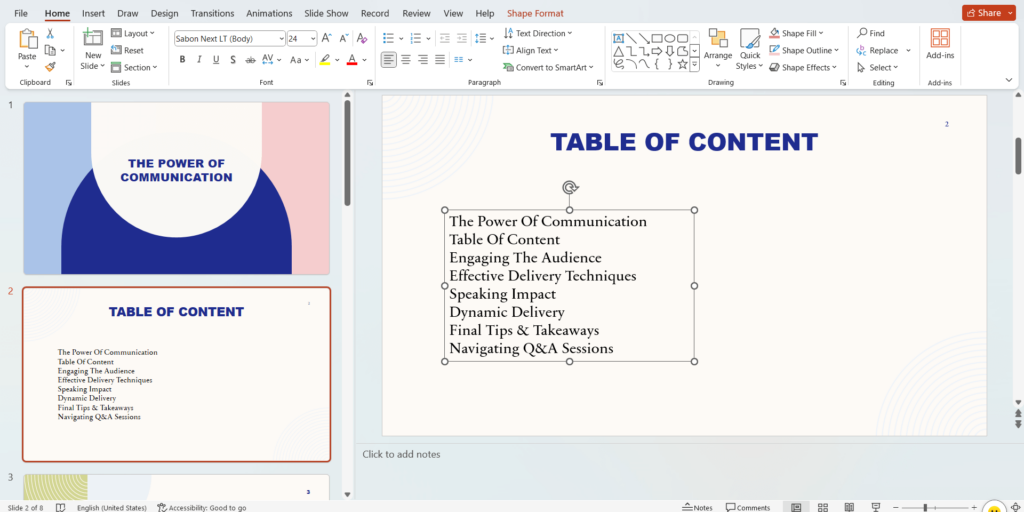
Step 5: Formatting (Optional): You can format the copied titles to match your desired table of contents style. Use the formatting options on the “Home” tab to adjust font, size, and spacing.
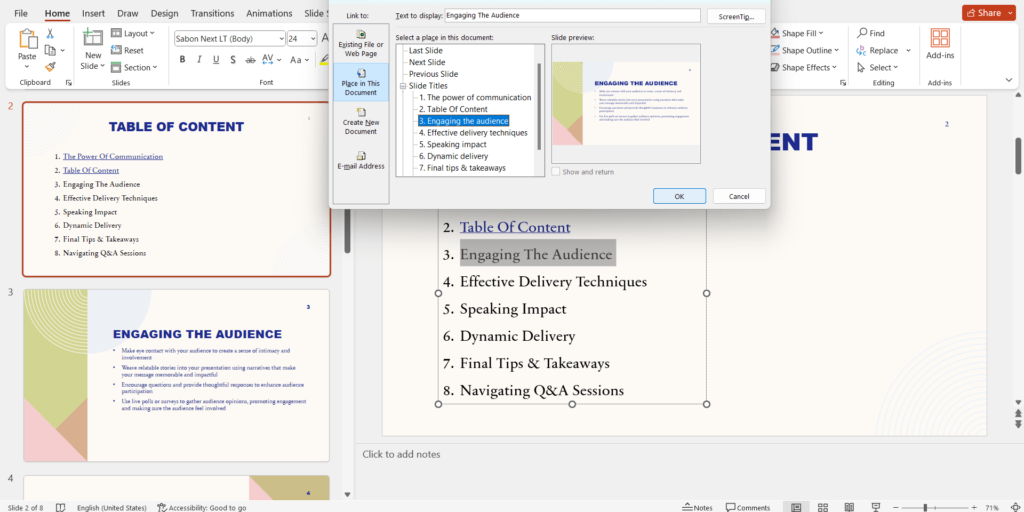
Step 6: Add Hyperlinks: To make your table of contents interactive, you can create hyperlinks for each entry. Select the entry text, then go to the “Insert” tab and click “Hyperlink.” Choose “Place in This Document” and select the corresponding slide from the list. Now clicking the entry in the table of contents will jump to that slide.
Create Presentations Easily in Google Slides and PowerPoint
14M+Installs

Method 3: Dragging Slides to Create a Table of Contents in PowerPoint
Step 1: Create a new slide for your table of contents: Go to the “Home” tab and click “New Slide.” Choose a layout that works for your table of contents, like a title and content layout.

Step 2: Navigate to the “Thumbnails” pane: This pane is usually on the left side of your PowerPoint window and shows thumbnails of all your slides.

Step 3: Drag and drop slides: Click and hold a slide thumbnail you want to include in your table of contents and drag it onto your new table of contents slide. Release the mouse button to drop it. Repeat this process for all the slides you want to add.
Step 4: Arrange and format: Once you have all the slides you want, arrange them in the order you like on your table of contents slide. You can resize the thumbnails by clicking and dragging their corners. You can also format the text associated with each thumbnail to match your presentation style.
Build Stunning Slides in Seconds with AI
- No design skills required
- 3 presentations/month free
- Don't need to learn a new software

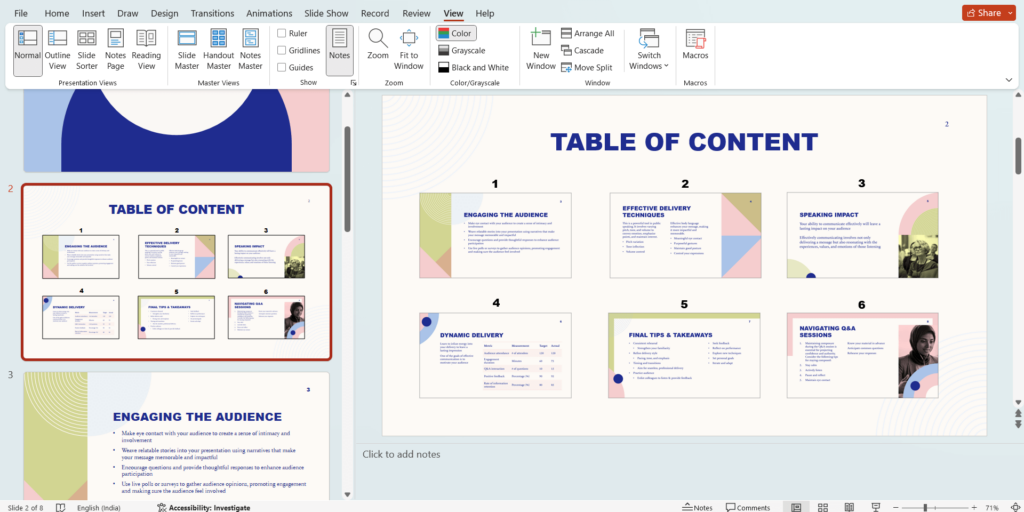
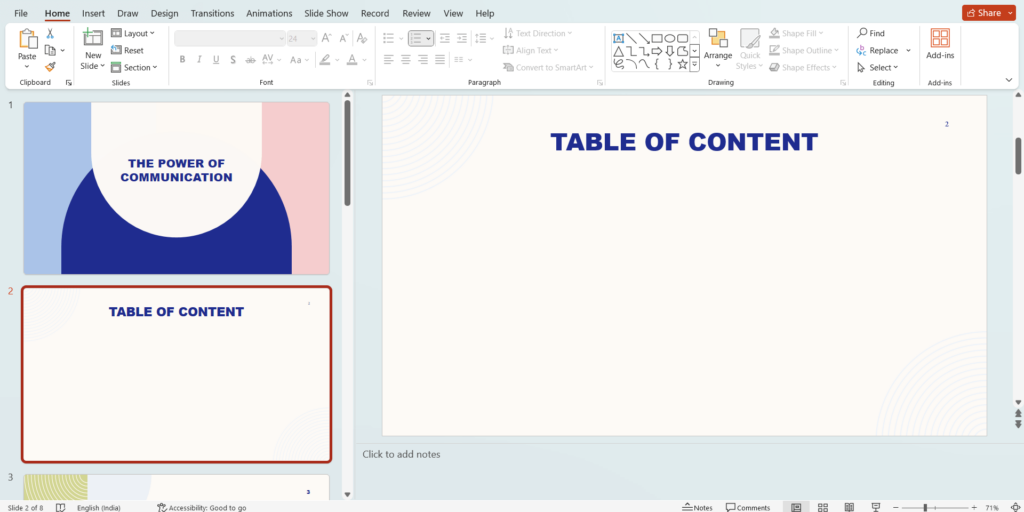
Method 4: Create a Table of Contents by Slide Zoom
PowerPoint’s Zoom feature allows you to create a visual table of contents for your presentation. Here’s how to do it using Slide Zoom:
Step 1: Insert a New Slide: Navigate to the “Home” tab and click “New Slide” to create a dedicated slide for your table of contents.
Step 2: Use Slide Zoom: Go to the “Insert” tab and locate the “Zoom” dropdown menu. Select “Slide Zoom” from the options.
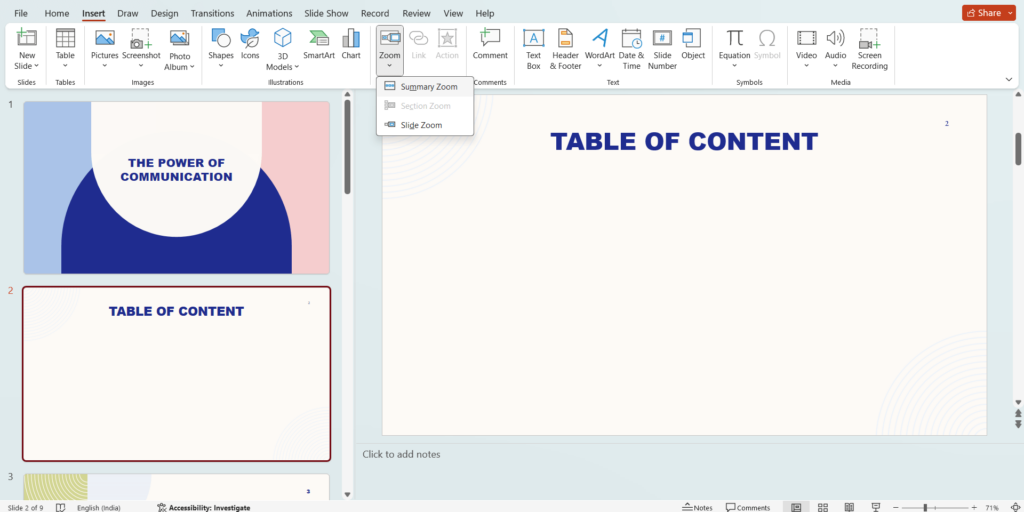
Step 3: Choose Slides: A “Slide Zoom” dialogue box will appear. Here, you can select the specific slides you want to include in your table of contents by clicking on their titles in the list.
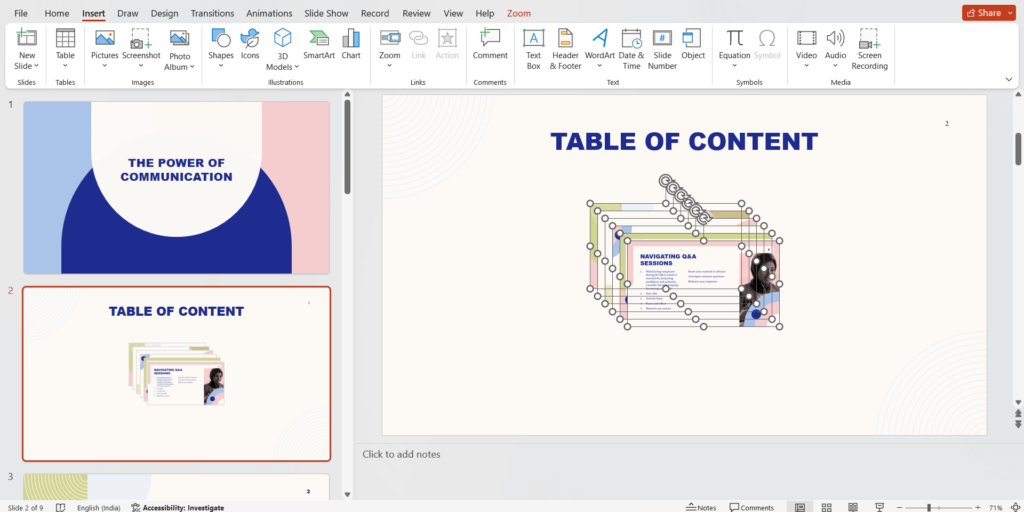
Step 4: Insert: Once you’ve chosen the slides, click “Insert” to add them as miniature versions onto your table of contents slide.
Step 5: Arrange: You can then arrange and resize these thumbnails to your preference.

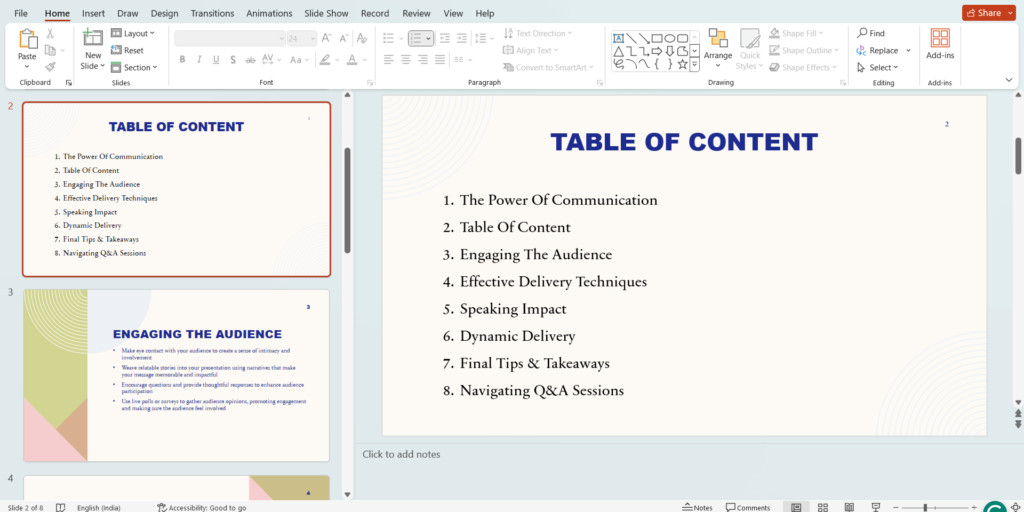
Method 5: Manually Add a Table of Contents
Step 1: Add a table of contents at the beginning of the presentation.
Step 2: Type the title of each slide in the presentation.
Step 3: You can also go to each slide to copy the title and paste it on the table of contents summary slide.
Step 4: As this method requires adding hyperlinks manually, head to the table of contents slide, select a heading, and click Insert > Link.
Step 5: Navigate to the bottom of the drop-down menu and select Insert Link, which opens the Insert Hyperlinks window.
Step 6: To link to a specific slide in the presentation, click Place in This Document, select the target slide, and insert the table of contents.
Use our Table of Contents Presentation Template to organize your slides clearly and make your presentation easier to follow.
Create Presentations Easily in Google Slides and PowerPoint
- No design skills required
- 3 presentations/month free
- Don't need to learn a new software
How to Customize a Table of Contents PowerPoint Slide?
Once you’ve created your table of contents slide, customizing it to match your presentation’s style makes it look polished and professional. Here are the key ways to do it:
- Match Your Presentation Theme: Align the TOC slide’s fonts, colors, and background with the rest of your deck. Use your theme’s color palette instead of default black-and-white text.
- Use Icons or Numbered Labels for Each Section: Add small icons or bold section numbers next to each entry. This makes the TOC easier to scan at a glance and adds a visual hierarchy that plain text lists lack.
- Highlight the Active Section as You Progress: If you’re reusing the TOC slide as a section divider throughout the presentation, dim or gray out the completed sections and bold or accent-color the current one. This keeps the audience oriented without needing extra slides.
- Add Hyperlinks to Every Entry: Turn each TOC item into a clickable hyperlink that jumps directly to the corresponding slide. In slide show mode, this turns your TOC into a live navigation tool, especially useful for Q&A sessions where you need to jump back to specific content quickly.
- Keep It to One Slide: Resist the urge to list every sub-point. A TOC should show main sections only, ideally 4 to 7 items. If your list runs longer than that, it’s a sign your presentation structure needs simplifying, not that your TOC needs a second slide.
- Use a Two-Column Layout for Longer Lists: If you genuinely have more than 6–7 sections, split the TOC into two columns rather than shrinking the font to fit. A two-column layout stays readable and looks cleaner than a wall of tiny text.
- Add Slide Numbers Next to Each Entry: Including the slide number alongside each section title helps your audience navigate on their own when reviewing a shared PDF or a recorded version of your presentation.
- Use SmartArt for a More Visual TOC: Instead of a plain text list, convert your entries to SmartArt (Home → Convert to SmartArt). This instantly gives your TOC a more designed, professional look with minimal effort, useful if you want visual structure without building custom shapes.
- Leave Enough White Space: Don’t crowd the slide. Generous spacing between entries improves readability and makes the slide feel polished. Padding around the content also prevents it from looking like a cramped bullet-point list.
- Test It in Slide Show Mode Before Finalizing: Always preview your TOC in full presentation mode before sharing. Check that all hyperlinks work, text is legible from a distance, and the overall layout doesn’t look cluttered on the actual screen size you’ll be presenting on.
Closing Thoughts
Adding a table of contents to your PowerPoint presentations can be a big help for everyone involved. It makes it easier for your audience to find the information they need, keeps you organized as the presenter, and even serves as a handy reference guide after the presentation is over. By following the steps in this guide, you can easily create a clear and helpful table of contents that will improve your presentation overall.
Frequently Asked Questions About Creating a Table of Contents for PPT
What are the shortcut keys for enabling “Outline View” in PowerPoint?
The shortcut keys for enabling “Outline Views” in PowerPoint are ALT+W+PO.
What Elements Can I Include in My Table of Contents?
Your table of contents can encompass diverse elements such as titles, page numbers, and essential document details. It’s also possible to incorporate headings, subheadings, and corresponding page numbers for every section within your presentation.
How Can I Make My Table of Contents More Visually Appealing?
Enhance the visual appeal of your table of contents by incorporating images or graphics. Customize the font, size, and color of the text to elevate its attractiveness. Consider adding a background image or color to the table of contents slide for added emphasis.
Are There Any Limitations to Creating a Table of Contents in PowerPoint?
Yes, there are certain limitations when crafting a table of contents in PowerPoint. Although you have the freedom to personalize it, embedding hyperlinks into titles or page numbers isn’t possible.
Why is a table of contents important in PowerPoint presentations?
A table of contents helps in organizing and navigating through a presentation, making it easier for both the presenter and the audience to locate specific information quickly.
Can I customize the appearance of my table of contents in PowerPoint?
Yes, you can customize the appearance of your table of contents by experimenting with different fonts, colors, layouts, and adding graphics or icons to make it visually appealing.
How often should I update my table of contents?
It’s essential to update your table of contents whenever you make changes to your presentation to ensure accuracy and relevance.